Standalone forms
Created on 11 Mar 2025
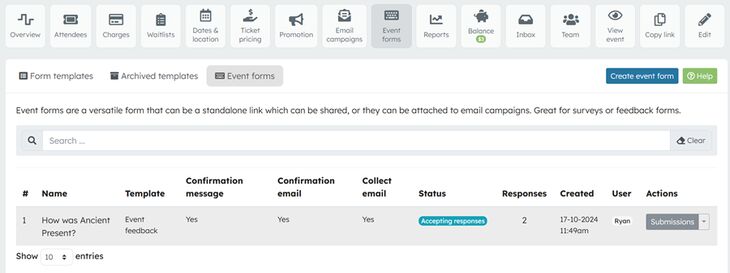
Standalone forms are a versatile tool that allow you to gather important information and feedback from attendees before, during, or after your event. These forms can be used to ask for event preferences, conduct surveys, or receive feedback. You can either share the form via a standalone link or embed it into an email campaign for seamless communication.
Key features
- Customisable form builder: Easily create forms that meet your specific needs using a simple interface.
- Multiple sharing options: Forms can be shared through a standalone link or attached to email campaigns.
- Flexible data collection: Collect feedback, preferences, or additional attendee information.


Steps to create a standalone form
1. Navigate to the form builder
To begin creating a standalone form, follow these steps:
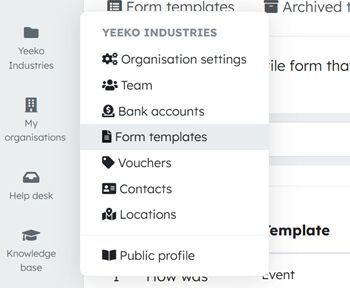
- From the dashboard, navigate to the Form templates section located in the side menu under your organisation.
- Click on Create form template
2. Select the form type
Once you're in the form builder, you can choose to:
- Create a new form template of type: Standalone form
3. Customise your form template
After selecting your template, you can begin customising it to fit your event needs.
- Form name: Add a title that makes it clear what the form is for, such as "Event Feedback" or "VIP Registration."
- Add form fields: Add form elements such as text fields, multiple-choice questions, drop-down menus, etc.
- Common field types:
- Text input for questions
- Rating scales for feedback (1-5 stars)
- Check boxes for multiple selections
- Common field types:
- Set field properties: Configure each field to make them required, optional.
4. Create a standalone form
After creating your template, navigate to Standalone forms from your events overview menu and click on "Create standalone form" and select your template
5. Set up notifications & logic
You can enhance your form with advanced features such as:
- Notification Settings: Set up email notifications to receive alerts whenever someone submits the form.
- Confirmation message: Customise the message users will see after they submit the form.
- Confirmation email: Customise the message users receive by email after the form is submitted.
6. Preview and test your form
Before finalising, it's a good idea to preview your form:
- Preview: Click the preview button to see what your form will look like from an attendee's perspective.
- Test: Submit a test form to ensure all fields and conditional logic work as intended.
7. Save and publish your form
Once you're satisfied with the form setup:
- Click Save to store the form as a draft.
- Select Accept submissions when you're ready to make the form live.
8. Share your form
After publishing, you can share the standalone form with your audience. You have two primary options:
- Standalone link: Copy the link to the form and share it via social media, SMS, or your website.
- Email campaigns: Embed the form link into an email campaign to send it directly to your attendee or contacts list.
9. Monitor form submissions
Once your form is live, you can track submissions through your dashboard:
- View responses: See responses in real-time.
- Export data: Download form submission data in CSV or Google Sheets for detailed analysis.
Tips for successful standalone forms
- Keep it concise: The shorter your form, the more likely people are to complete it.
- Use conditional logic: This keeps the form clean and relevant to each individual respondent.
- Test on multiple devices: Ensure your form looks and functions well on mobile as many users will fill out forms from their phones.
- Follow up: Consider sending reminder emails to attendees who haven't completed the form.
Conclusion
Standalone forms are a powerful way to gather information and feedback from your attendees, helping you better understand their needs and improve future events. The form builder makes it simple to create, Customise, and share forms that work for your specific goals.
For more assistance or to explore advanced options, visit our support center or contact customer service.
Related articles
Guest ticket automation allows you to streamline your event registration process by automatically creating free tickets
Custom form templates allow you to collect specific information from attendees when they register for your events.